In this blog, we will see how to create factbox of workflow history of purchase order in Microsoft Dynamics 365 Finance and Operations
Details:
Well, Factbox is a very pretty cool feature available from the earlier version AX 2012. It is very easy to achieve in Dynamics 365 as well.
Here we will see how easy it is and steps for that.
As shown in the above image, we will be going to create factbox for the "Tracking details list"
Steps:
Create the solution in Visual Studio and project for that. We'll be required four objects mainly that is one display MenuItem, Table, Form (on which to display factbox), another Form (factbox). Reference attached below:
1. Table
For displaying workflow history, we need to create the extension of table WorkflowTrackingStatusTable and create the normal relation and its relevant properties as

2. Factbox
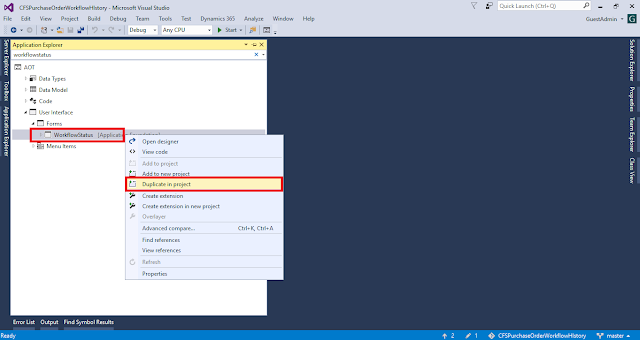
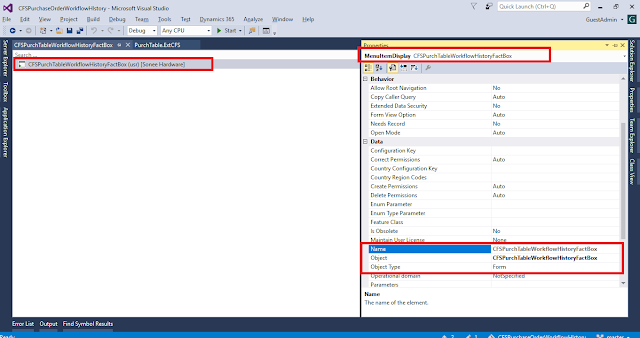
Now we are required to create the factbox of workflow history. For that we will use the effortless technique, where we will duplicate the standard form "WorkflowStatus" and will name as CFSPurchTableWorkflowHistoryFactBox (give name as per your naming convention standards)

After applying the custom pattern, delete the NavigationList which is not required in factbox, and do visible false ActionPane and PanelTab
After that create the new Grid and assign the data source to it in the property and put all the required fields to show in factbox
3. Display MenuItem
We will attach the created factbox form to the display menu item and relevant label "Workflow history"

4. Base form
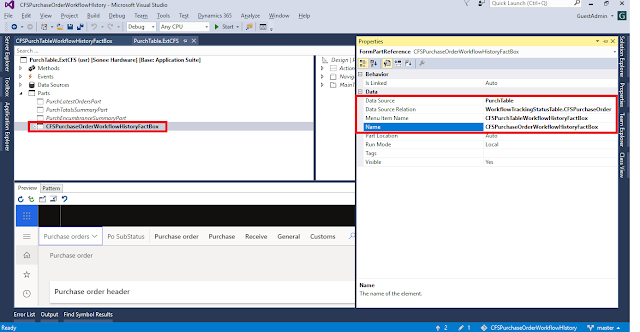
Base form we call it as where we will attach the factbox. Here it is purchase form. Go to Parm section and create a new part and give it a relevant name and its properties

Properties:
Data source: Attached data source with which workflow history is connected
Data Source Relation: WorkflowTable.RelationName
Name: Part name
That's it. Build the project and go the frontend and check the output how it looks like.
Conclusion:
Hurray, How pretty it looks like!
In the above example, we have seen how we can develop factbox in Microsoft Dynamics 365 Finance and Operations.
Thanks for reading and stay connected with us for more updates!!!
Jagdish Solanki | Senior Technical Consultant | CloudFronts
Business Empowering
Solutions Team
“Solving Complex Business Challenges with Microsoft Dynamics 365 & Power Platform”


No comments:
Post a Comment